K-BAGZ
De Plane! De Plane!
- Joined
- Dec 22, 2012
- Messages
- 524
- Reaction score
- 12
- Points
- 0
- Location
- Far North QLD
- Members Ride
- VR II S-pac V6 Ute / VZ SV6 Sedan / VZ R8
Firstly, why install Polyair Airbags?
The Polyair kit is a heavy duty air bag kit which restores ride height and prevents bottoming out. It does not replace the original coil springs but works with it, original springs tend to sag from wear or from overloading. Each kit is designed to level the vehicle to the original designed height with up to 500 kg of load, some vehicles can be raised an additional 25mm when inflated with maximum air pressure and carrying minimum load. Tyres and shocks last longer and it gives you much better handling and stability and all Polyair kits have been tested in Australian conditions both city and the country. Polyair are also great for off road and are air adjustable.
Now, this is the way that I've completed the task. You may do somethings differently, but I don't need to be told. I can appreciate advice given in respect to this thread but negative comments should be left in your head. I have started this thread to assist other vehicle enthusiasts who want to complete this modification. Enjoy the read.
Tools Required
- Safefy glasses and gloves
- Polyair Airbag Suspenion kit
- Trolley jack and jack stands
- 1/2'' socket set
- Breaker bar and/or ratchet bar
- 1/2'' torque wrench
- Bullnose pliers
- Scissors/shears
- Bench grinder w/ wire wheel or wire brush
- Electrical or cordless drill
- Drill bits
- Centre punch
- Hand riveter and rivets
- Zipties
- Anti seize compound
- Hand or electric air pump
- Air pressure gauge
- Time and patience


Step 1
Place the vehicle in gear/in park, with the hand brake on. Chock the front wheels with blocks of timber or whatever you have.

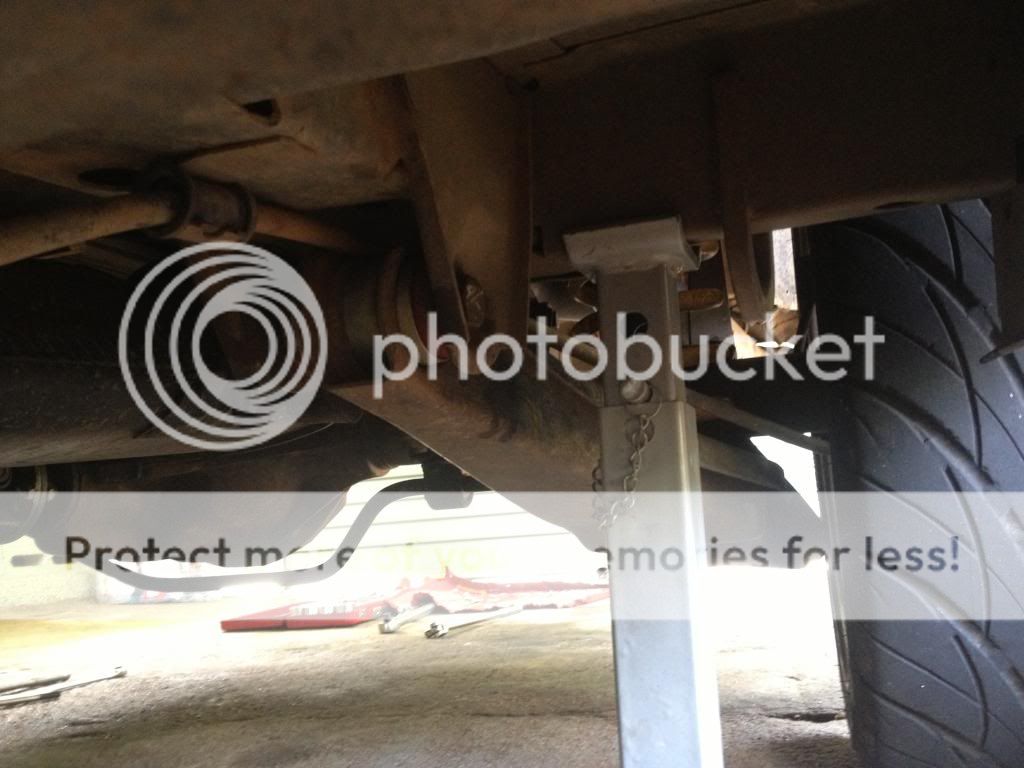
Step 2
Raise the chassis at the rear , enough to have the axle suspended. And place two jack stands under the chassis. (Preferable location in picture)

Step 3
Remove both left hand side and right hand side, rear lower control arm bolts and nuts. 19mm spanner and 19mm socket required. You can use the open end of the spanner as leverage on the bolt to remove it from bush and control arm. Once the bolts are removed, push the control arm down and let it swing to the ground.
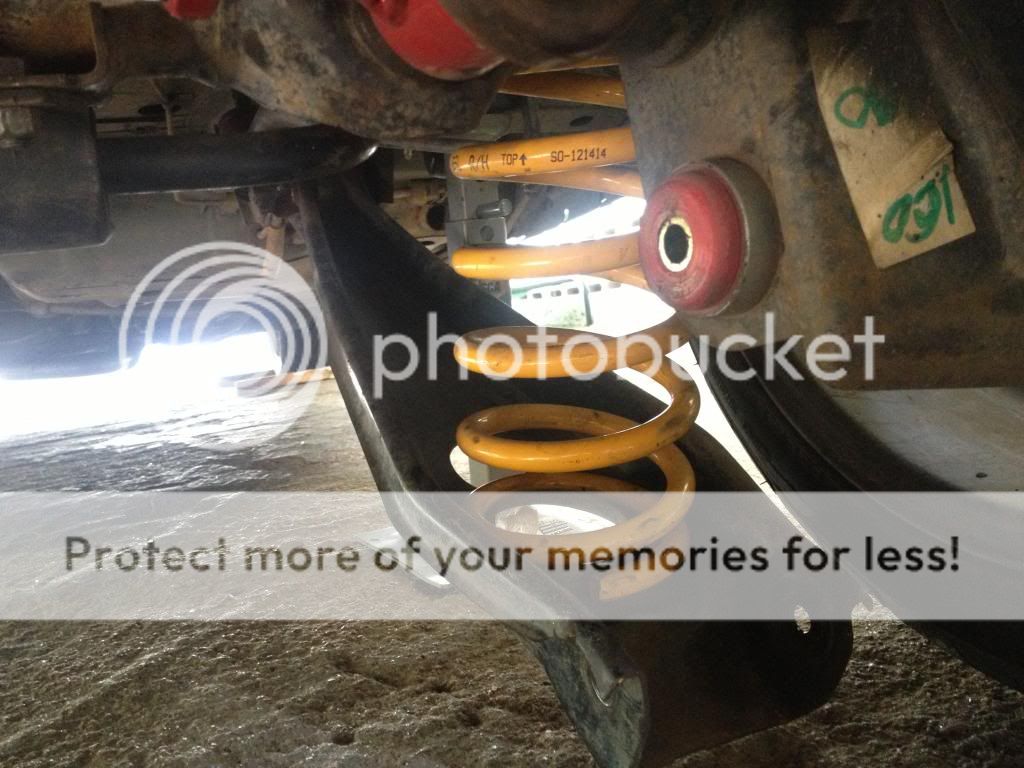

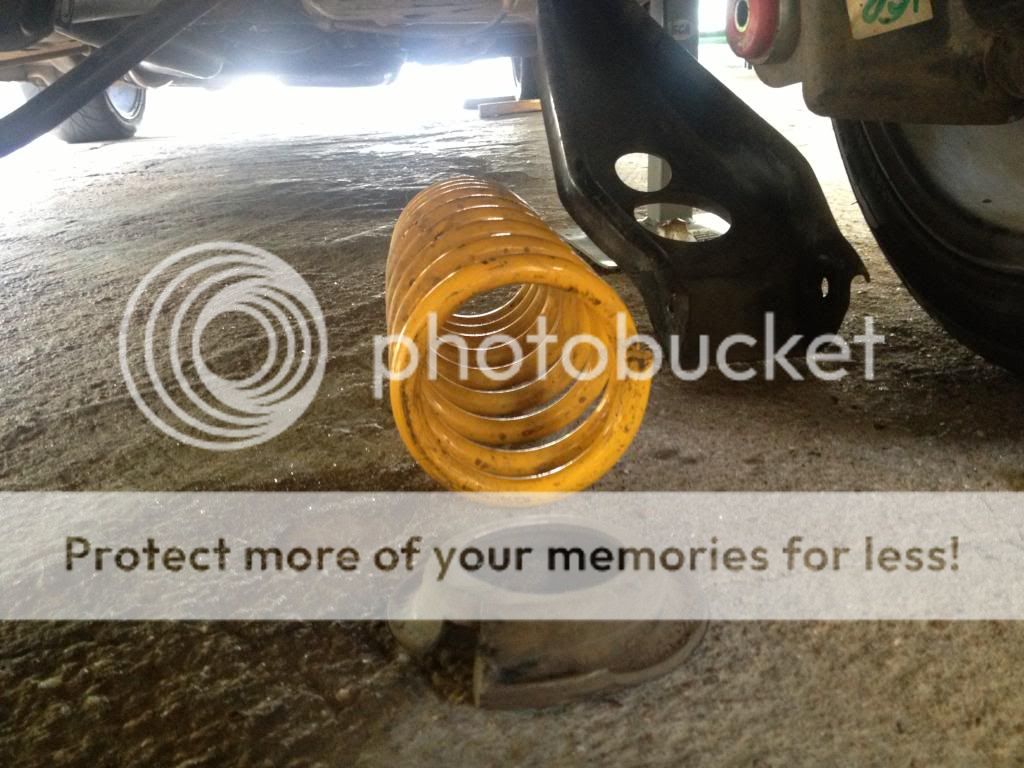
Step 4
Remove both springs and spring insulators from each control arms. Install the Polyair airbags into the springs (stem facing the top of the spring), and install the lower mushroom mounts into the control arms.


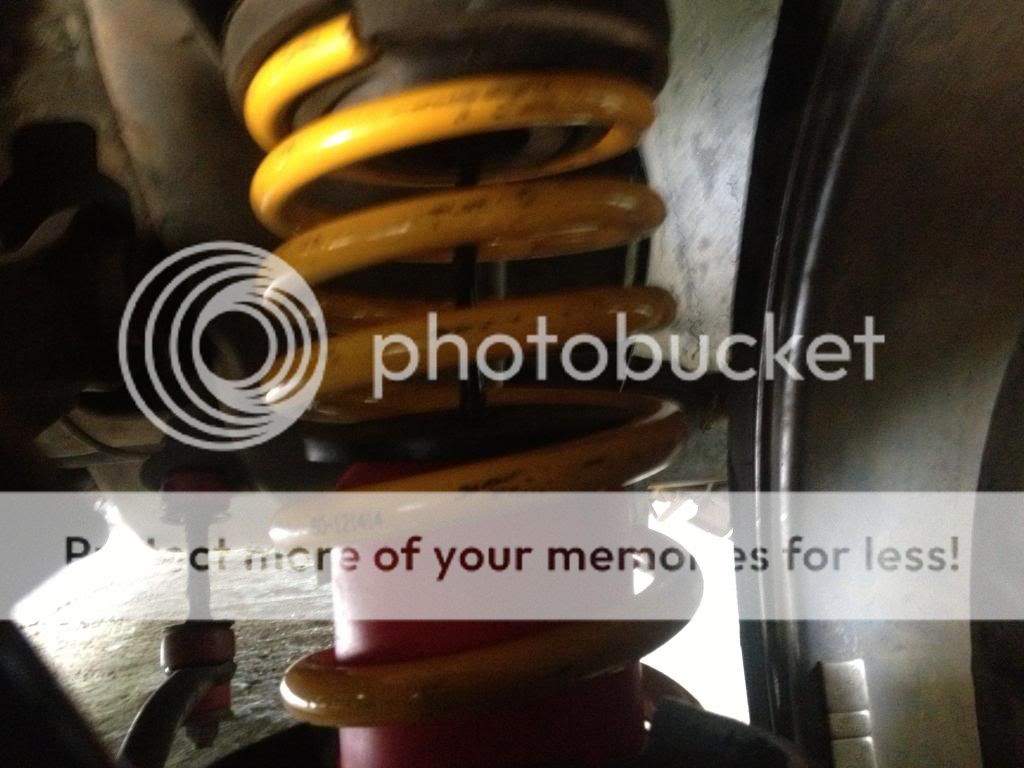
Step 5
Cut the hose supplied in equal halves and attach one end to the airbag positioned in the spring, then attach the hose clamp. Next, install the upper rubber spacer.


Step 6
Reinstall the spring insulators into the correct location on the control arm and chassis or on the spring. And place the airbag/spring combo back into each control arm.

Step 7
Buff/clean the rear lower control arm bolts and nuts. And then coat with anti seize before installation. Reinstall both lower control arms.


Step 8
Torque the rear lower control arm bolts to 95-110Nm. 19mm spanner and 19mm socket with torque wrench required.

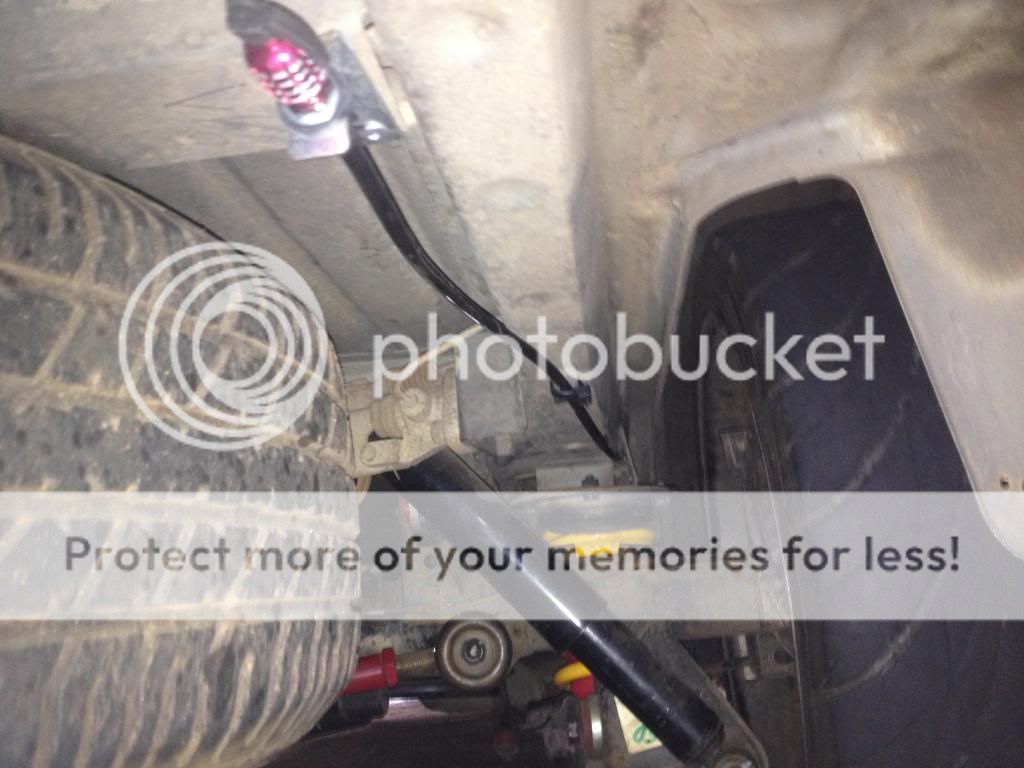
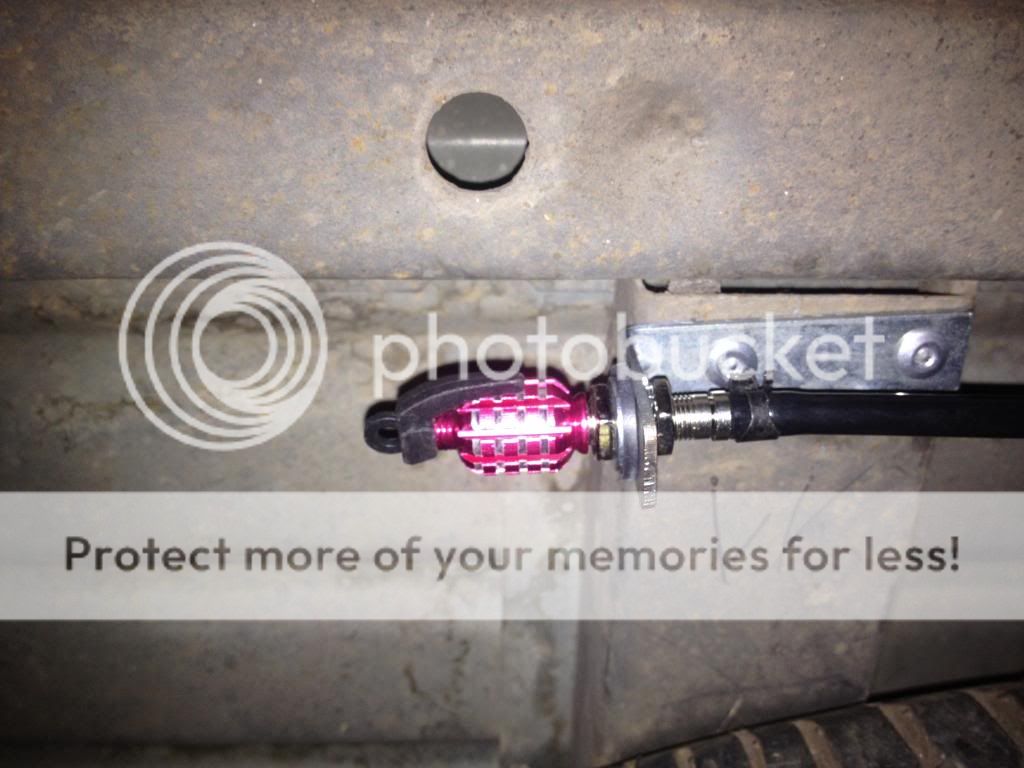
Step 9
Route the airbag hose to wherever you decide to mount it. Install the air valve at the designated fitment location. Install air valve cap and tighten valve nuts so only one thread is visible between the valve cap and valve nut.(I mounted my airbag valves on either side of the tray on the last tray chassis rail)
Step 10
Inflate both airbags to 170kpa and check for leaks and clearances around the exhaust and suspension systems. Repair any leaks if found.
Step 11
Deflate/inflate the airbags to determine the best ride quality and comfort.
MUST HAVE A MINIMUM OF 5PSI AT ALL TIMES PRESENT IN THE AIRBAG.
Step 12
Pack up the tools and clean the work area, because you sir are DONE! This task only took me close to an hour. So give or take to the blokes that like to chill and sink piss, my father for one. Took him 4 hours to do a set on his Patrol.
Anyhow, I hope you enjoyed the read! Thank you.
I will update this thread with comments on the ride quality after I take the ute for a drive.
The Polyair kit is a heavy duty air bag kit which restores ride height and prevents bottoming out. It does not replace the original coil springs but works with it, original springs tend to sag from wear or from overloading. Each kit is designed to level the vehicle to the original designed height with up to 500 kg of load, some vehicles can be raised an additional 25mm when inflated with maximum air pressure and carrying minimum load. Tyres and shocks last longer and it gives you much better handling and stability and all Polyair kits have been tested in Australian conditions both city and the country. Polyair are also great for off road and are air adjustable.
Now, this is the way that I've completed the task. You may do somethings differently, but I don't need to be told. I can appreciate advice given in respect to this thread but negative comments should be left in your head. I have started this thread to assist other vehicle enthusiasts who want to complete this modification. Enjoy the read.
Tools Required
- Safefy glasses and gloves
- Polyair Airbag Suspenion kit
- Trolley jack and jack stands
- 1/2'' socket set
- Breaker bar and/or ratchet bar
- 1/2'' torque wrench
- Bullnose pliers
- Scissors/shears
- Bench grinder w/ wire wheel or wire brush
- Electrical or cordless drill
- Drill bits
- Centre punch
- Hand riveter and rivets
- Zipties
- Anti seize compound
- Hand or electric air pump
- Air pressure gauge
- Time and patience
Step 1
Place the vehicle in gear/in park, with the hand brake on. Chock the front wheels with blocks of timber or whatever you have.
Step 2
Raise the chassis at the rear , enough to have the axle suspended. And place two jack stands under the chassis. (Preferable location in picture)
Step 3
Remove both left hand side and right hand side, rear lower control arm bolts and nuts. 19mm spanner and 19mm socket required. You can use the open end of the spanner as leverage on the bolt to remove it from bush and control arm. Once the bolts are removed, push the control arm down and let it swing to the ground.
Step 4
Remove both springs and spring insulators from each control arms. Install the Polyair airbags into the springs (stem facing the top of the spring), and install the lower mushroom mounts into the control arms.
Step 5
Cut the hose supplied in equal halves and attach one end to the airbag positioned in the spring, then attach the hose clamp. Next, install the upper rubber spacer.
Step 6
Reinstall the spring insulators into the correct location on the control arm and chassis or on the spring. And place the airbag/spring combo back into each control arm.
Step 7
Buff/clean the rear lower control arm bolts and nuts. And then coat with anti seize before installation. Reinstall both lower control arms.
Step 8
Torque the rear lower control arm bolts to 95-110Nm. 19mm spanner and 19mm socket with torque wrench required.
Step 9
Route the airbag hose to wherever you decide to mount it. Install the air valve at the designated fitment location. Install air valve cap and tighten valve nuts so only one thread is visible between the valve cap and valve nut.(I mounted my airbag valves on either side of the tray on the last tray chassis rail)
Step 10
Inflate both airbags to 170kpa and check for leaks and clearances around the exhaust and suspension systems. Repair any leaks if found.
Step 11
Deflate/inflate the airbags to determine the best ride quality and comfort.
MUST HAVE A MINIMUM OF 5PSI AT ALL TIMES PRESENT IN THE AIRBAG.
Step 12
Pack up the tools and clean the work area, because you sir are DONE! This task only took me close to an hour. So give or take to the blokes that like to chill and sink piss, my father for one. Took him 4 hours to do a set on his Patrol.
Anyhow, I hope you enjoyed the read! Thank you.
I will update this thread with comments on the ride quality after I take the ute for a drive.